Pepito CleanerText Cleaner for Libre/Open Office |
  |
Pepito CleanerText Cleaner for Libre/Open Office |
|
 Pepito Cleaner
 Pepito AddText
| ◄ | General Find | ► |
The examples in this guide have been performed on a test document can be downloaded here.
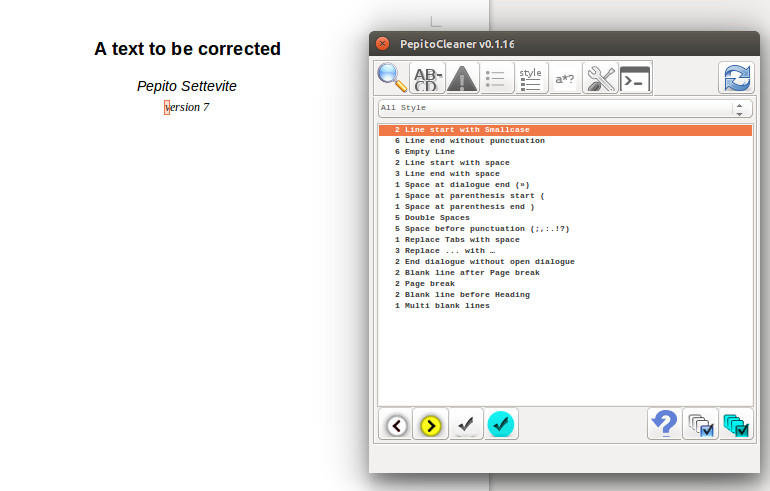
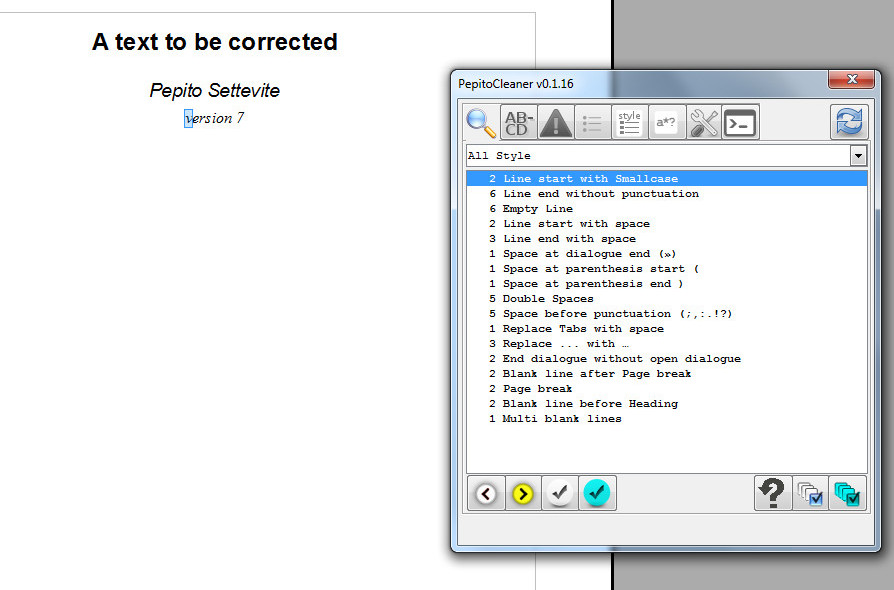
This section, accessible by clicking on the icon that represents a lens, is the heart of the extension. This extension will summarize all the possible flaws that the extension is able to search in the document being analyzed. Each search is displayed on one line in the center window of the extension. In the example the first line is '2 Line start with Smallcase'. In line specifies the number of occurrences of that error (2) and the name that identifies the mistake Line start with Smallcase.
LibreOffice - Ubuntu |
OpenOffice - Windows |
If you make a click on a line (in example's image is the first line) will be searched and highlighted the first occurrence of that mistake and will appear more icons in the bottom of the window extension. These icons are:
|
|
This button will try and highlight the next occurrence of the error selected. In case you have reached the end of the document, depending on your settings, you are asked if you rerun the search from the beginning or not. The same function can be achieved by pressing the 'n'. |
|
|
This button will try and highlight the previous occurrence of the error selected. In case you have reached the beginning of the document, depending on your settings, you are asked if you re-run the search at the end or not. The same function can be achieved by pressing the 'p'. |
|
|
This button will perform automatic correction set for that mistake. In the example of the document analyzed the paragraph will be merged in the previous paragraph. After the correction will be sought after the previous or the next occurrence, depending on the direction of the last search made. Direction that is possbile to see why it is highlighted by the yellow color of the arrow as in the example. The same AutoCorrect feature can be achieved by pressing the 'm'. |
|
|
This button will perform automatic correction alternative set for that mistake. After the correction will be sought after the previous or the next occurrence, depending on the direction of the last search made. Direction that is possbile to see why it is highlighted by the yellow color of the arrow as in the example. The same AutoCorrect feature can be achieved by pressing the ','. |
|
|
This button is available only if you have already performed an automatic correction earlier. Pressing the button will cancel the previous action. The same function can be achieved by pressing the 'z'. |
|
|
This button will alternately select or clear the application of the error search again from the beginning or end of the document in the event that it has been filled. If the icon is gray, no question will be placed and the cursor will automatically restart at the end or beginning. If the icon is blue, the question will be placed. |
|
|
This button performs the automatic correction for all occurrences for all selected errors. |
|
|
This button performs the automatic correction alternative for all occurrences for all selected errors. |
In any case it is always possible to manually intervene on the document to Modicare the error as you see fit. The error count will be updated only in the case of automatic correction.
The list box located in the high area of the extension (the one in the example displays 'All Styles') allows circonscrivere troubleshooting the selected style.